
FAQ
[NEW!] LIQMAXFLO AIO Liquid CPU cooler Series Q&A
Find the answers to the most common questions you ask about the LIQMAXFLO Series:
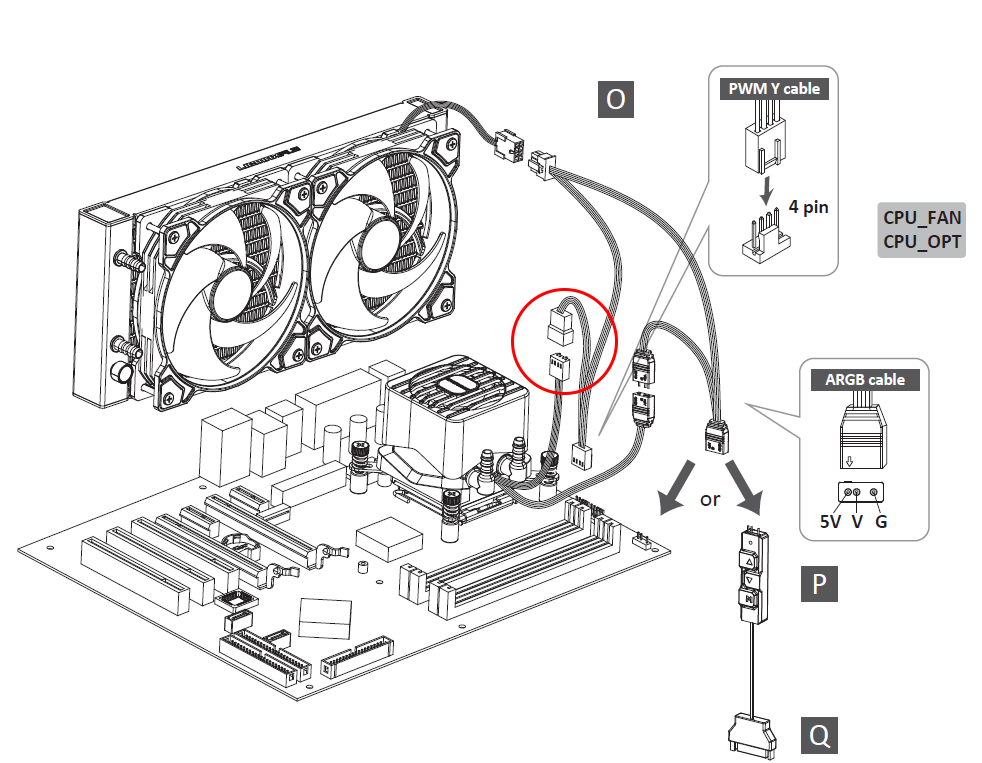
Q1: The user manual states that "connect the fans to the motherboard with PWM Y cable" but no mention of the PWM cable coming out of the pump, what do I do with that? Also which where to on the motherboard?
A1: The red circle indicates the PWM cable of the water block. Use accessory O (PWM Y cable) to connect the fans and the water block in series, and then connect them to the motherboard. If you want the AIO cooler to retain PWM functionality, please refer to the motherboard manual and connect it to a header with PWM control.
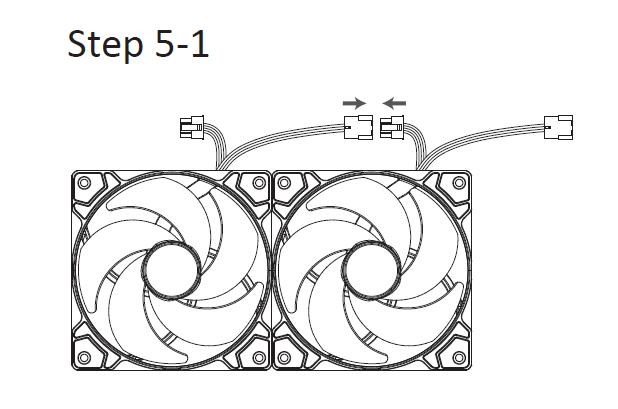
Q2: My old AIO Water CPU cooler has two separate cables for the pump and the fan, but I only see one cable now, which fan header should I use?
A2: The fan cables of the LIQMAXFLO series have been optimized for easier cable management. With the new method, if you have more than two radiator fans, they will be interconnected first, and with just a single PWM Y Cable, both of the fans and the pump will be connected before connecting to the motherboard to create a cleaner system look. To activate the PWM functionality, please refer to the motherboard manual and connect it to a header with PWM control.
Q3: The fans are running at full speed even at idle and it's loud, is it defective? (If plugged into pump header)
A3: First, you need to check the definition of the header you have plugged into. Taking ASUS(ROG) as an example, the default mode when plugged into their "AIO_PUMP" header is full speed, which means even connecting a PWM fan to this header will run it at full speed. Since the definition varies by motherboard manufacturer, if you encounter such issues, you can enter the BIOS or motherboard software to adjust the fan mode, or you can connect the fan to another header with PWM control.
Q4: How do I control the speed of the radiator fan(s), VRM fan, or pump?
A4: Please enter the BIOS or use motherboard software to adjust the speed. If you’re using a PWM Y Cable to connect the fans with the pump, it will simultaneously control the radiator fan(s), VRM fan, and pump at the same time.
Q5: Can I set different speeds for the pump and fans?
A5: Yes, you can adjust the speed by entering the BIOS or using the motherboard software.
Q6: Is there an option to turn off the VRM fan on the ?
A6: Due to the 4-pin connector which supplies power to both the VRM fan and pump, the VRM fan cannot be turned off individually.
Q7: How do I configure my PWM settings?
A7: Please connect the cooler to a header with PWM control. For more details, please refer to the manual of the motherboard.
Q8: What speed should I set the pump speed to?
A8: It’s recommended to use the PWM function to let the fan adjust its speed based on the system load. For manual control, it’s recommended to set it at full speed to achieve the best cooling performance.
Q9: Isn't it better to have the pump set at 100% all the time?
A9: If you’d like to prioritize cooling performance over noise, you can set the pump at full speed for optimized cooling. However, if you wish to have a low noise during low loads, you can use the PWM function to control the pump to achieve the balance between noise and performance.
Q10: My system is reporting the RPM at 0, is the pump dead?
A10: If you encounter this issue, please access the BIOS or your motherboard software to check if the fan mode is set to 0 rpm control.
Q11: My system is reporting the RPM at 1207, does that mean it's the speed for both fans, pump, and VRM fan?
A11: The PWM Y Cable which is included with the LIQMAXFLO SR series will detect the speed of the radiator fan, so the 1207 RPM is the speed of the radiator fan. If you want to detect the speed of the VRM fan, you can connect the 4-pin header of the water block separately to the motherboard to get the speed of the VRM fan.
Q12: My fan is barely turning, are the fans dead?
A12: If the fan speed is set to its minimum start-up threshold, it might prevent the fan from operating correctly. Please avoid setting it to the minimum start-up threshold.
Q13: My motherboard is giving me a warning that no CPU_FAN is detected at bootup, what should I do?
A13: Each motherboard manufacturer sets one of the headers to be essential for a successful boot, usually labeled as CPU_FAN. This header isn't specifically for either the PUMP or the fans; as long as it is attached. In the LIQMAXFLO AIO cooler, fans and water blocks are connected through the PWM Y Cable which can be connected to CPU_FAN as a necessary condition for booting. Also, each motherboard manufacturer may have different naming conventions. Please refer to the motherboard manual for more details.
Q14: The header on my motherboard is not supplying enough power, what should I do?
A14: Generally, the current supplied by a header is between 2 - 3A. For the LIQMAXFLO 420mm AIO, the total current is approximately 0.67A (Fan-0.08A*3 + Pump-0.43A), so there shouldn't be an issue of insufficient power from the motherboard. If you happen to have a motherboard with a lower power supply, you can remove the water block's 4-pin connector from the PWM Y Cable and connect it separately to another header to distribute the current.
Q15: What does the included SATA adapter do?
A15: The SATA adapter is an extra accessory that allows you to connect the power supply with any of the 4-pin devices.
Still can't find the answers you want? Click the picture below to connect with one of ENERMAX's experts!
![]()
⚠️Recommended PSU for NVIDIA GeForce RTX 40 Series
ENERMAX's power supply series provides reliable wattage output to support your NVIDIA GeForce RTX 40 Series and AMD Radeon™ RX 7000 Series graphics cards.
You may choose higher efficiency or wattage power supply for potential system upgradeability from the recommendation list. A lower power rating may work depending on the system configuration.
If your RTX 4070 graphics card requires PCIe 8-pin power, you can also consider the REVOLUTION D.F. 2 power supply.
NVIDIA
⚠️Recommended PSU for AMD Radeon™ RX 7000 Series
ENERMAX's power supply series provides reliable wattage output to support your NVIDIA GeForce RTX 40 Series and AMD Radeon™ RX 7000 Series graphics cards.
You may choose higher efficiency or wattage power supply for potential system upgradeability from the recommendation list. A lower power rating may work depending on the system configuration.
If your RTX 4070 graphics card requires PCIe 8-pin power, you can also consider the REVOLUTION D.F. 2 power supply.
AMD
⚠️TDP Compatibility for AMD & Intel CPUs
● Efficient cooling with maximum performance
● Cooling with possible thermal throttling under heavy load
● Thermal throttling under load
* Be aware that the recommended cooler can only work as intended if the case is providing adequate airflow, and the cooler performance is tested when the CPU is running full loading.
* The TDP of coolers are calculated by Thermal resistance testing machine, please refer to the formula "TDP (Watts) = (tCase (° C) - tAmbient (° C)) / (HSF Θca)"
[AIO] AQUAFUSION Series Installation Guide (AM5 & LGA1700)
Installation Guide Video For Socket LGA1700
Installation Guide Video For Socket AM4 & AM5
AQUAFUSON series includes:
ELC-AQF120-SQA
ELC-AQF240-SQA
ELC-AQF360-SQA
ELC-AQF120-SQA-W
ELC-AQF240-SQA-W
[AIO] LIQMAX III 120 HF Installation Guide (AM5 & LGA1700)
Installation Guide Video For Socket LGA1700
Installation Guide Video For Socket AM4 & AM5
LIQMAX III 120HF (ELC-LMT120-HF)
[AIO] LIQMAX III RGB Series Installation Guide (AM5 & LGA1700)
Installation Guide Video For Socket LGA1700
Installation Guide Video For Socket AM4 & AM5
LIQMAX III RGB series includes:
ELC-LMT120-RGB
ELC-LMT240-RGB
[AIO] LIQMAX III ARGB Series Installation Guide (AM5 & LGA1700)
Installation Guide Video For Socket LGA1700
Installation Guide Video For Socket AM4 & AM5
LIQMAX III ARGB series includes:
ELC-LMT120-ARGB
ELC-LMT240-ARGB
ELC-LMT240-W-ARGB
ELC-LMT360-ARGB
ELC-LMT360-W-ARGB
[AIO] LIQTECH II Series Installation Guide (AM5 & LGA1700)
Installation Guide Video For Socket LGA1700
LIQTECH II series includes:
ELC-LTTO240-TBP
ELC-LTTO280-TBP
ELC-LTTO360-TBP
[AIR] ETS-T50 AXE Series Installation Guide (AM5 & LGA1700)
CLICK TO DOWNLOAD ETS-T50A-FSS USER MANUAL
Installation Guide Video For Socket LGA1700
Installation Guide Video For Socket AM4 & AM5
ETS-T50 AXE series includes:
ETS-T50A-BK-ARGB
ETS-T50A-W-ARGB
ETS-T50A-FSS
[AIR] ETS-F40 FS Series Installation Guide (AM5 & LGA1700)
Installation Guide Video For Socket LGA1700
Installation Guide Video For Socket AM4 & AM5
ETS-F40 FS series includes:
ETS-F40-FS
ETS-F40-BK
ETS-F40-BK-ARGB
ETS-F40-W-ARGB
[AIR] ETS-T40 Fit Series Installation Guide (AM5 & LGA1700)
Installation Guide Video For Socket LGA1700
ETS-T40Fit series includes:
ETS-T40Fit-TB
ETS-T40Fit-BK
ETS-T40Fit-W
ETS-T40Fit-RF
AMD Socket AM4 and AM5 Compatibility
ENERMAX CPU Coolers are fully compatible with AMD Socket AM5 for Ryzen 7000 processors!
The new AM5 socket (LGA1718) is used in AMD’s new 4ᵗʰ generation Ryzen processors (Ryzen 7000 series).
ALL ENERMAX CPU coolers released after late 2021 are AM5 ready!
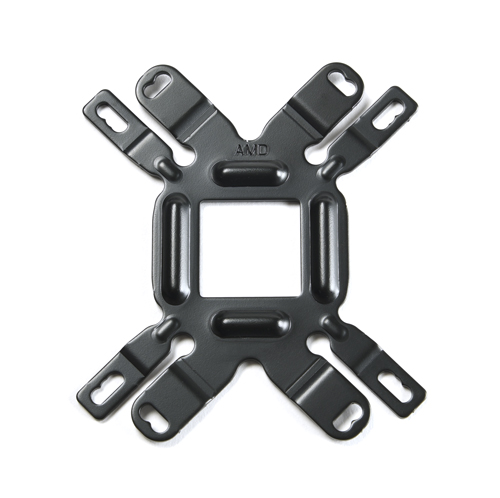
With ENERMAX CPU cooler series, users don’t need an extra back plate for AM5!
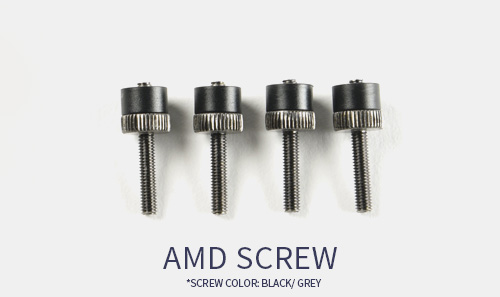
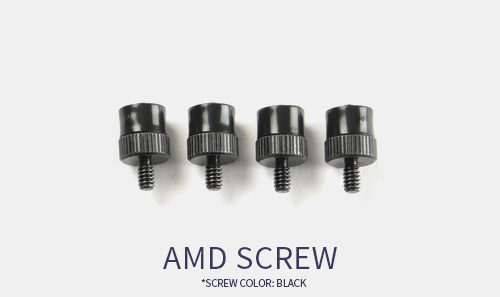
ENERMAX provides screws designed specifically for AM4's and AM5’s pre-installed back plate.

The mounting kits of ENERMAX’s CPU Coolers are upgraded in 2021, compatible with AMD socket AM4, AM5, and lntel LGA 1700.
For customers whose ENERMAX CPU coolers are the previous version, which does not come along with the upgraded mounting kit, you may contact your ENERMAX local branch to request a new mounting kit.
ENERMAX Worldwide Website
ENERMAX Global
ENERMAX USA
ENERMAX Europe
ENERMAX Japan
ENRERMAX China
ENERMAX Taiwan
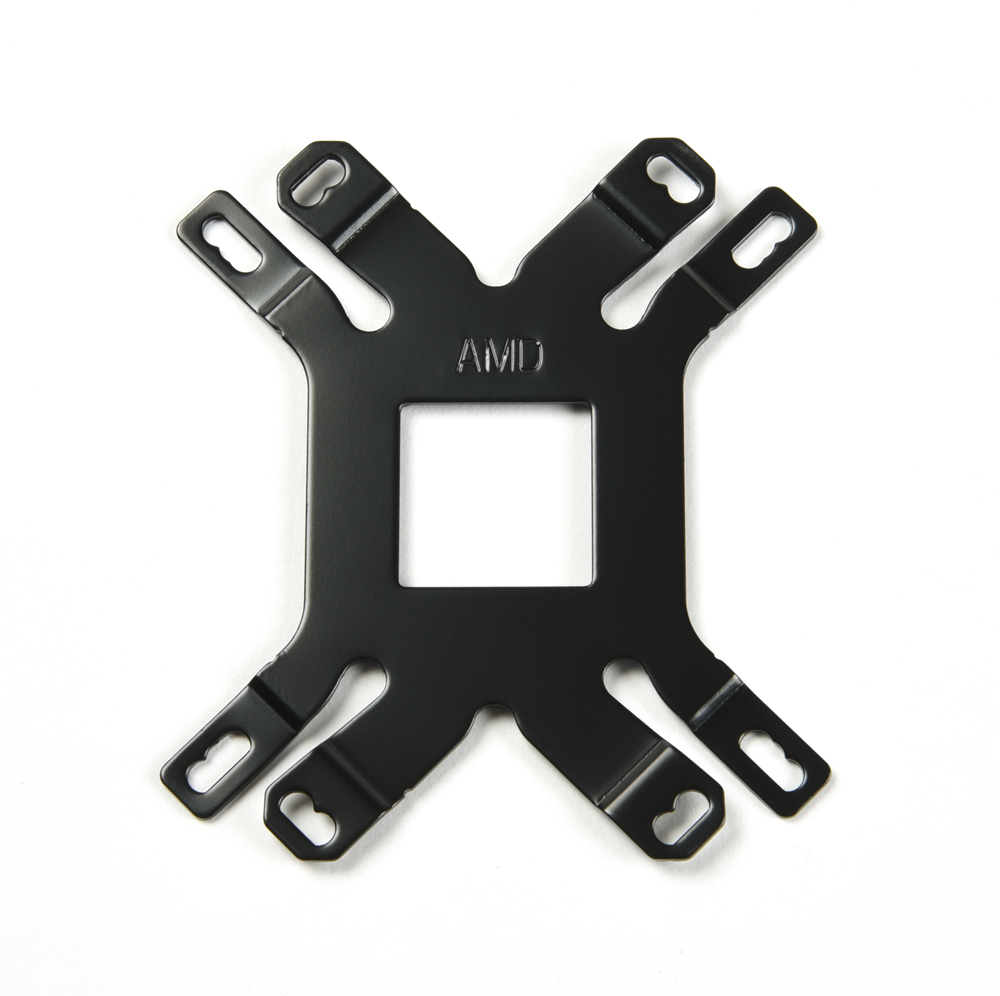
Previous version of CPU cooler the backplate photo
AQUAFUSION
LIQMAX III
ETS-T50 AXE
ETS-F40
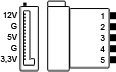
The RGB Controller Specifications
| RGB Sync. Connector |  3 pin ARGB (5V/Data/-/GND) |
|
| RGB Sync. Compatibility | Asus, Asrock, MSI, Gigabyte, Razer Chroma (with Asrock and MSI mainboards) | |
| Lighting Modes | - |
Racing-Rainbow (Default), Breathing-Rainbow, Flash-Rainbow, Overlaying-Rainbow, Flow-Rainbow, Colors auto-run (8 colors), Ripple auto-run (8 colors), Overlaying-RED, Overlaying-GREEN, Overlaying-BLUE |
| Power Connector | - |
|
| Max. Current | - |
3A |
What is "Thermal Resistance" of CPU Cooler
| Thermal resistance= (Tc- Ta)/ CPU Input Power = n ℃/W. Whereas Tc= CPU Core temperature. Ta= Ambient temperature. The thermal resistance of 0.1℃/W cooler means when CPU increases 1W power consumption, the cooler will have the CPU temperature increase 0.1℃. Therefore, smaller the thermal resistance value, higher cooling performance of the cooler. |
The Difference Between AC Fans & DC Fans
| AC fan uses alternative current to power the fan, whereas DC fan uses direct current. AC powered fan is usually used on home appliance, big size, high speed fans. DC powered fan is usually used on PC industry, and its fan speed can be adjusted by changing the supplied voltage. |
What are the normal working ambient of case fans
| The conventional case fan working ambient is around -10~60℃. Some of ENERMAX fan has upgraded componments and can extend the working ambient to 85℃ such as Magma or TwisterPressure series. |
What are ENERMAX Twister Bearing Advantage against sleeve and ball bearing
| ENERMAX's patented Twister bearing has self-lubricated composite, therefore, it has no lubricant drained or deteriorated risk. The built-in magnet stablizs the fan shaft and keeps the vibration/friction away. Therefore the Twister bearing has quieter performance than sleeve bearing, and longer MTBF than two-ball bearing. Furthermore, the Twister bearing allows the fan be detached/re-attached for easy dust cleaning. |
How to convert the airflow unit
| CFM = cube feet per minute; m3/h= cube meter per hour; m3/h = CFM x 1.699 |
What is a PWM fan and how does it work
| Common DC fan can be adjusted its fan RPM by changing the supplied voltage. The PWM (Pulse-Width-Modulation) fan uses additional signal to receive the PWM (from MB or other console) to adjust its RPM. |